
Acrylic Pouring (Fluid Art) — A Beginner's Guide
Leiðbeiningar8 October 2026By Föndurlist
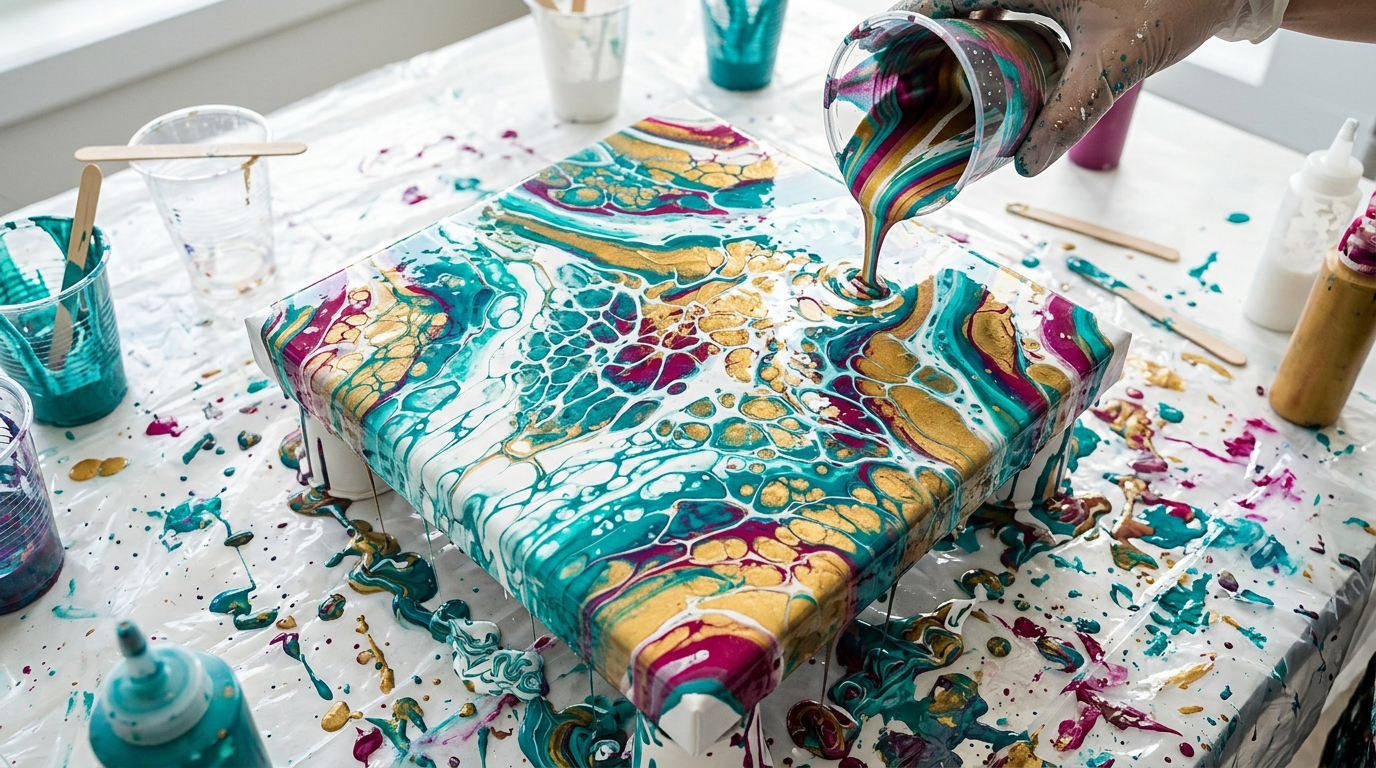
Acrylic pouring (also known as fluid art) is one of the most fun and accessible ways to create vibrant, abstract art — no experience needed. You pour thinned acrylic paint over a canvas and let the colours flow together into unique patterns and "cells". Here's your beginner's guide.
What do you need to get started?
- Pouring paint or acrylic paint — ready-made pouring paint is the easiest option. See Mont Marte SuperCell Pouring Paint, or use regular acrylic paint thinned with a medium.
- Pouring medium — mixed into the paint so it flows correctly and doesn't crack. See DecoArt Americana Pouring Medium.
- Canvas or surface — canvas, wooden panel, or MDF. Browse canvases in all sizes.
- Silicone drops (optional) — a few drops of silicone oil create those sought-after "cells".
- Supplies — plastic cups, mixing sticks, disposable gloves, and plastic sheeting to protect your work surface.
Core Techniques — The Main Methods
- Dirty pour — pour multiple colours into a single cup and tip it over the canvas.
- Flip cup — place the cup upside down on the canvas, then lift it so the colours flow out.
- Puddle pour — pour colours in rings, one on top of another, in the centre of the canvas.
- Swipe — drag a dry tool or piece of card lightly across the surface to draw out cells.
Step by Step: Your First Pouring Piece
- Mix your paint. Stir together the paint and pouring medium until the consistency resembles liquid honey. Add a few drops of water if needed.
- Add silicone (optional). 1–3 drops per colour for cells. Stir very gently.
- Pour. Choose your technique (dirty pour / flip cup) and pour over the canvas.
- Tilt the canvas. Slowly tilt in all directions so the paint covers the entire surface and edges.
- Bring out the cells. Lightly pass a heat gun or lighter over the surface to encourage cells to form (if silicone is used).
- Let it dry. Leave flat for 24–72 hours, protected from dust.
Good to Know
- Paint consistency is key — too thick and it won't flow; too thin and the colours will look washed out.
- Protect your finished piece with a clear varnish or resin topcoat once fully dry for a glossy, mirror-like finish.
- Start small — 20×20 cm canvases are inexpensive and perfect for practising.
Ready to get started?
Browse everything for acrylic pouring at Föndurlist, or get hands-on guidance at our Acrylic Pouring workshop where you can learn the techniques in person.